Wayfinder Widgets
The Wayfinder Widgets are small web applications that show your room bookings on the screens.
Introduction
Smartsign Wayfinder is an add-on application that uses Smartsign Display Manager to create bookings for meeting rooms and then show them on displays to guide staff and guests. Limitedcustomization is possible to fit the customers’ requirements
Licensing
Smartsign Wayfinder is an add-on application to Smartsign Display
Manager. To purchase the rights to use it, please contact your reseller
or Smartsign Sales department. A valid Support & Upgrades agreement
(SMSUP) is also required for continued use.
Server requirements
Smartsign Server 10.2 or higher, or Smartsign cloud service.
Player requirements
Smartsign Wayfinder Widgets 10.7 are designed to work on several
hardware platforms:
PC using Smartsign Player
Samsung SSSP
Android using Smartsign Android Player
LG webOS for Signage
Functional Description and concepts

Communication
The Wayfinder widgets are what's booked to the screens and they are
responsible for showing the booking information. The widgets/screens
only communicate with Smartsign Server. All bookings are stored on the
Smartsign Server. Wayfinder Importer provides optional communication
between Smartsign server and external systems.
Resources / Rooms / Channels
The term resource is used because a booking does not have to pertain to
a room specifically. It can be any bookable resource. Within Smartsign
the bookings are stored in "Channels". One channel for each resource.
Bookings
Resource bookings is usually a normal channel booking without content.
It has a time, name and optional description only. Because the bookings
are empty a special permission is required to create and view them. This
permission is granted by default to users with the profile Wayfinder,
but can be granted to other users as well by changing the setting
"AllowCreateEmtpyBookings" to "True" on that user.
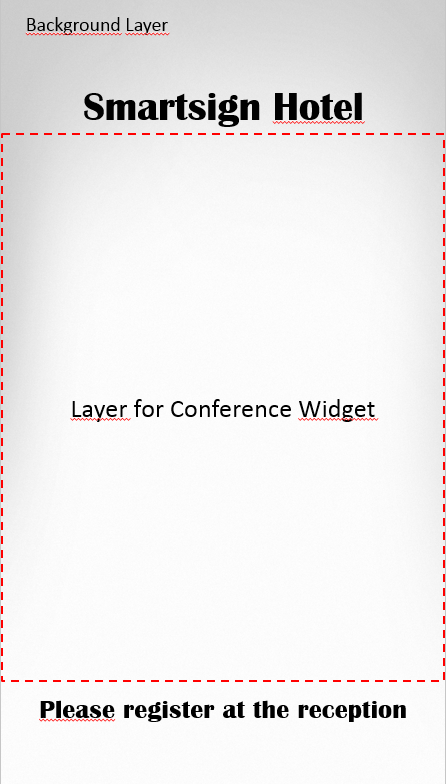
Basic Design Concepts
Use Smartsign Display Manager to create the basic design for your screen
using screen layout and layers. It can be just a background with a
Wayfinder widget on top or you can add several widgets for other
information such as news and weather. Finally you may choose to add
trigger layers to display alternative content when the resource or
resources are not booked. An example layout for each widget is provided
within the delivery.
Installing the widgets
The following steps detail how to install both the widgets and the
necessary supporting content to use them. Installation is performed per
site, regardless if you are running on Smartsign's cloud service or an
on-premise server.
The widgets and supporting content are provided as several .zip archives
that must be imported into Smartsign. It is important that they are
imported in the correct order to function as intended.
To import the archives, simply upload them one by one, to the media
library or go to screen layouts and choose Import in the action bar and
upload them there. Wait for each import to complete before you upload
the next.
Import order
- Wayfinder media content
- Wayfinder screen layout theme
- Wayfinder screen layouts
Each layout contains a Wayfinder widget directly in the layout. That
widget is located in the respective media folder in the media library.
Edit the widget there to configure it.
We then recommend that you create a booking with the widget instead in
order to limit the time which the screen operates. The widget is not
designed to run 24/7 which it will do if you just use the layout and no
booking. Should you wish to run the screen 24/7, then create a booking
from 00:00 to 23:59. This is sufficient to cause a reload of the widget
nightly which will avoid update issues.
Server Setup
To use Smartsign Wayfinder you will need to setup the following on your Smartsign Server.
- One or more users for the Wayfinder Widgets, Booking staff, Wayfinder Importer
- One or several Channels (one for each resource/room)
- Create a group for your rooms, for example "ConferenceRooms"
- Create a user for the widgets, for example "wayfinder-myCompany"
- Give it the userprofile "Wayfinder"
- Add it to the group "ConferenceRooms"
- Create a Channel for each room (ie Room 1, Room 2, Room 3)
- Give access to the group "ConferenceRooms"
Create a resource booking
- Logon or assume the identity of the user "wayfinder-myCompany"
- Go to Channels
- Select the resource that you would like to book
- Create a booking
- If you have a logo for the booking, you can add it in the first step. Otherwise click Next.
- Choose the start and end time for the booking
- Choose which resource/resource to book
- Click Next
- Put the name of the booking in name and optionally a description
- Click Publish
Available widgets
Three widgets are available out of the box.
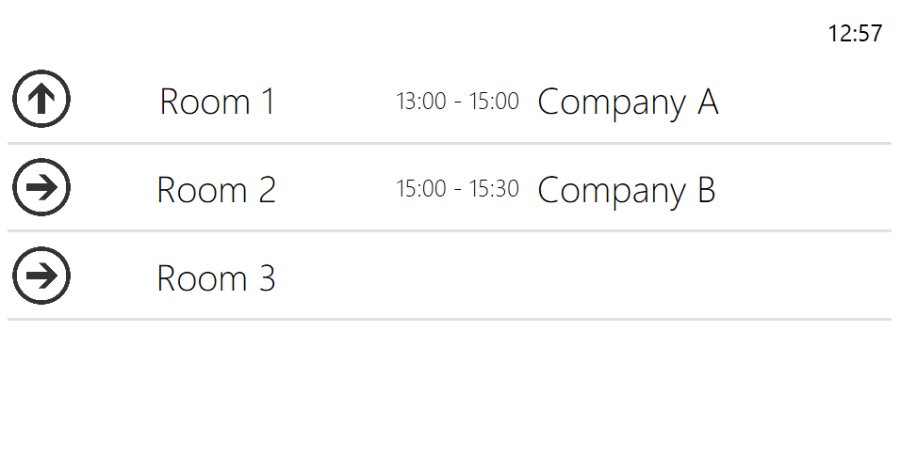
Entrance Lobby
This is your basic lobby screen widget. It will display a list of resources and bookings in your reception/lobby including an arrow to direct people in the right direction.
Basic example:
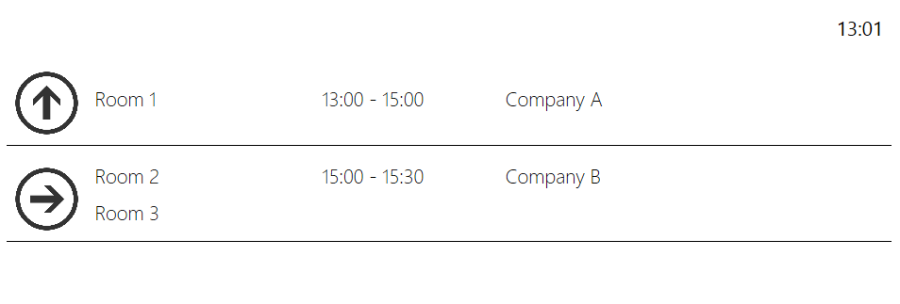
Direction
The Direction widget works the same as Entrance Lobby, but allows grouping the resources. Instead of showing a direction for each room, it will display direction for each group. It is possible to modify the order of directions by customizing the widget.
Basic Example:
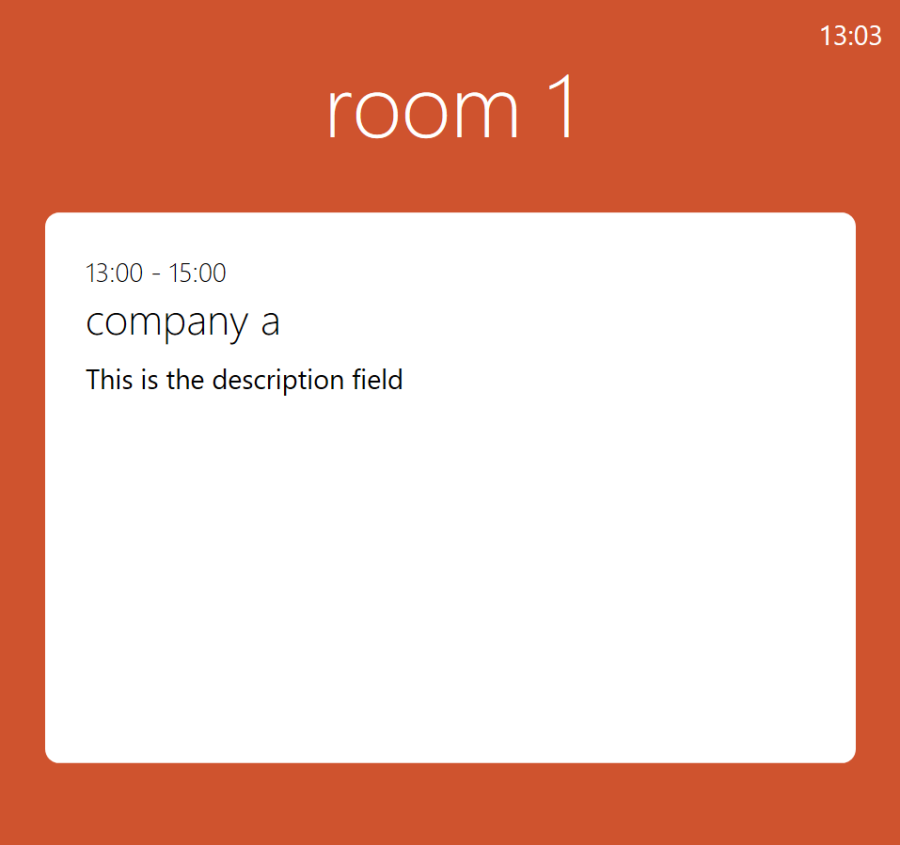
Single Room
The Single Room widget displays bookings for a single resource.
Basic Example:
Booking/Configuring a widget
Booking
- Go to the calendar and select the screen and layer where you want the widget to display information
- Select Add content and choose a Wayfinder widget from the media library.
- Select Edit Content if the widget is not already configured
- Provide the username, in our case "wayfinder-myCompany", and
password for your widget.
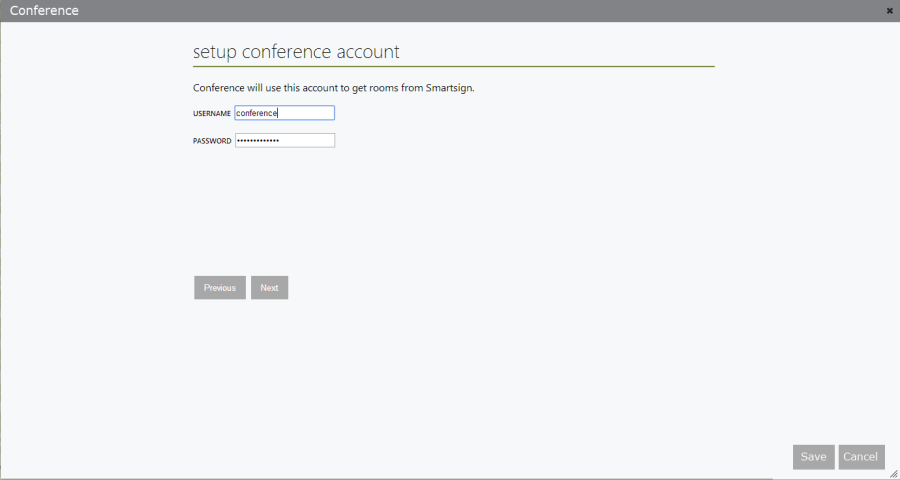 5. Click Next
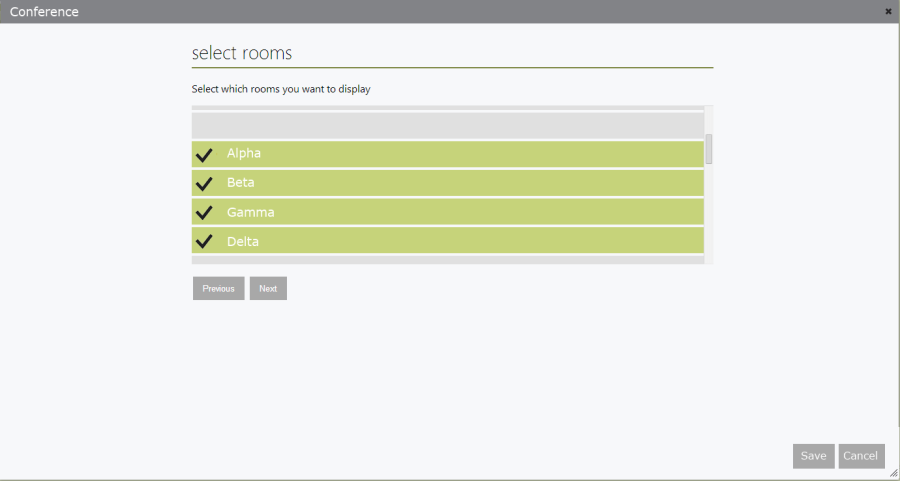
 - Select the resource/resources that you want to display.
 7. Click Next
 - Select the direction to each resource by clicking the arrow in front of each
- Change the display name for the resource if you would like something
different than the actual resource name
 10. Click Next
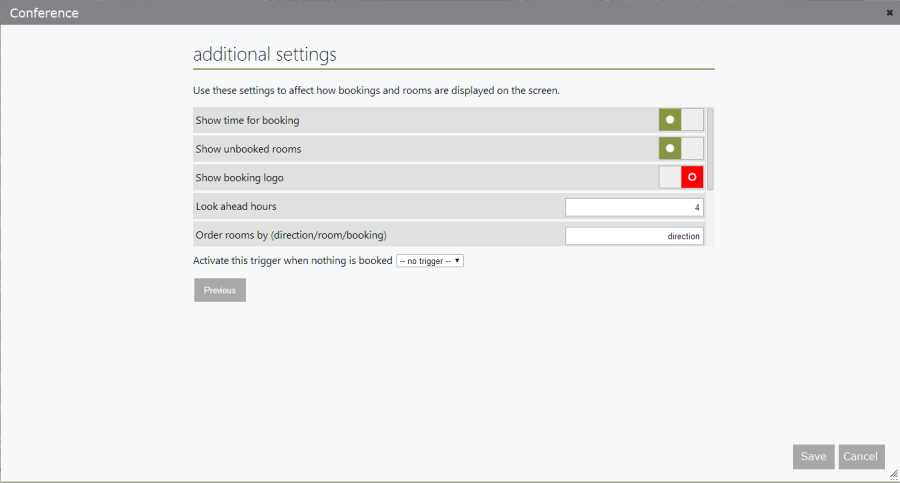
 - Choose settings for the widget (see separate section for details)
 12. Click Save
 - Wait until the new thumbnail appears
- Finalize the playlist by choosing time and screens etc.
- Publish
Using UserData to configure the Single Room widget
Instead of creating a widget for each resource it's possible to reuse a
single widget and have it fetch the resource information from the player
it's running on. This makes it easier to maintain since you only need to
keep track of a single widget.
To use UserData, configure the widget and enter the credentials as
usual, make sure that you can see at least one room in the list. If you
can't see any rooms, make sure the user has permission to access the
channels in question.
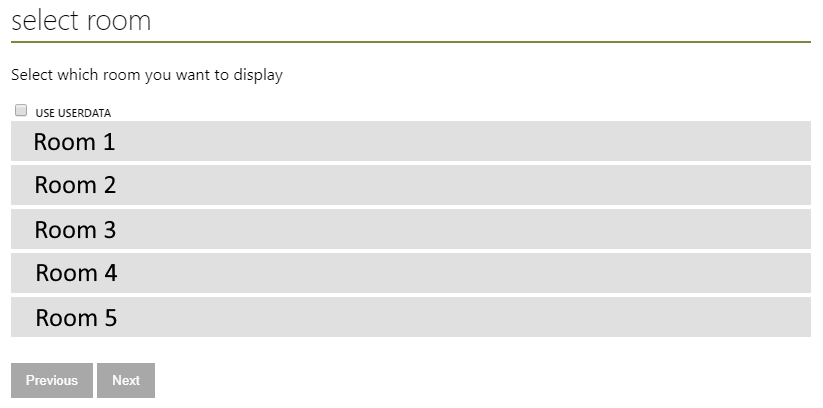
Enable the setting "Use Userdata"

Click next, a brief information about player configuration is shown.
Complete the configuration as usual and save the widget.
Instead of using different widgets for each screen you will now use the
same widget for all of them.
For the widget to know which screen should show which room you will need
to configure this on each screen's player.
Each player has 3 userdata settings that can be used for custom
purposes.
UserData1 must be configured with a json-string containing the
information the widget needs.
You can find the correct string to use by checking the Advanced tab
while viewing the room channel in Smartsign. (Management -> Content ->
Channels, View the channel, Click Advanced tab)

Copy the complete string to the UserData1 setting for the player. If you
want to adjust the display name of the room, change the name parameter
in the string, in this case "Room1".
Widget Settings
| Setting | Description |
|---|---|
|
Show time for booking |
True: Show time for the bookings, ex 08:00-09:00 |
|
Show unbooked rooms |
True: Show all selected resources |
|
Show booking logo |
True: Show logo for the booking if
supplied |
|
Look ahead hours |
How many hours before the booking occurs should it be displayed (no decimals allowed) |
|
Order rooms by (direction/room/booking) |
direction: Sort rooms by their
direction |
|
Show clock |
True: Show clock |
|
Show next booking |
True: Show info about the next booking if
there is any |
|
Allow on screen booking |
True: Allow the screen to create bookings if
the room is unoccupied (not fully implemented) |
|
Activate this trigger when nothing is booked |
Select a trigger to activate if there are no
bookings |
Using the Logo feature
Manual bookings using Smartsign Publisher
To use logos when you create manual bookings, create a booking as you
would normally, but instead of skipping the first step of the booking
you upload a logo image or select one from the media library.
Imported bookings using Smartsign Wayfinder Importer
When you create a Wayfinder importer data source there are two settings
that control how logos are matched and attached to the bookings created.
| Setting | Description |
|---|---|
|
MatchLogos |
True: Search the Media
library for images files where the filename or tags match the booking
name. If found, the first match will be added to the booking in
Smartsign. |
|
MatchLogoExact |
True: Only match logos with names or tags matching exactly. |
When you create a Wayfinder Importer data source you configure a
Smartsign user credential which operates that data source internally.
You must make sure to give that user access to the media library folder
where you upload the logos.
Logos are only matched when the bookings are imported and created.
Uploading a logo afterwards will have no effect on existing bookings.
Customizing the layouts
The appearance of the Wayfinder add-on is mainly customized by adjusting the provided layouts. Doing so requires good knowledge in how layouts work and should not be attempted otherwise. The layouts are provided as is. If you don't have the necessary skills to perform customizations you should not attempt to. Performing customizations are in no shape or form included in the support agreement.
In general, the layouts consist of a full screen background image, a logo, a clock and a Wayfinder widget. Simply replace the background image and logo and adjust the sizes of the layers to achieve your desired look.
It is strongly recommended that you use the included Wayfinder screen layout theme in any layout using the Wayfinder widgets. It includes styling overrides that allow you to adjust the look of the widgets. This is done by modifying the CSS code on the Advanced tab in the screen layout theme. Again, do not attempt such adjustments unless you have the necessary html5/CSS programming skills.
Customizing Widgets
Important, read Customizing the layouts first.
Most common adjustments can be done by simply modifying the screen layout theme. Using that method means you'll be able to replace the widgets when/if new versions are provided without having to reapply your own changes to them. If you instead modify the actual widgets, you must maintain those changes and perform them again every time you perform an update.
Widgets are HTML5 based and are essentially a web app packaged in a zip archive with .wgt as file extension. To access the insides you can just change the file extension from .wgt to .zip and unzip it.
The widgets use HTML5, CSS and javascript. Customizing the widgets requires at least a basic understanding of these content/programming languages.Smartsign will not teach you how to program.
Here are some of the files which you may want to modify.
| Files | Description |
|---|---|
|
CSS: |
We strongly recommend that you do
not change these files in the widgets. Instead it is possible to
override the CSS using the screen layout theme. By doing so you don't
have to keep track of changes to the widgets should you need to upgrade
or replace them at a later date. |
|
HTML: |
These files are the templates that are used
to generate a configured widget. Once you configure a widget, this file
will be copied to index.html and the settings made in the wizard will be
inserted. |
|
Javascript: |
This script contains the main logic for requesting and filtering bookings from Smartsign Display Manager. |
Common customizations
| Customization | |
|---|---|
Change the direction icons | Replace the images in \images\directions
(.svg) |
Change the sorting of directions | Edit the main javascript file (see above) and change the variable directionOrder. |